Tutorial 2.3
Adding a Wildlife Observation at a named Site
This tutorial demonstrates how to add a single wildlife observation to your FieldNotes database, using a previously named Site as the location where you saw it.
Using named Sites will speed up recording and also provide more environmental context to your wildlife observations.
Before starting you will need to know ...
-
What you saw - the common or scientific (latin) name
-
When you saw it - the date (and optionally time)
-
Where you saw it - the (previously described) Site name.
This tutorial assumes that you have added a named Site to your FieldNotes database (see Tutorial 2.2), and that this is the location where this latest Observation was made.
Familiarising yourself the 'New Observation' form
The 'New Observation' form is used extensively for adding information to your
FieldNotes database.
If you wish to explore the various data-entry methods and associated controls/tools, follow the tutorial steps below in your own copy of
FieldNotes - when you have completed the tutorial simply select the
Cancel button instead of the
OK button to discard any data you have entered on the form (the database contents will remain unchanged).
Preliminary Steps in adding a Wildlife Observation (at a named Site)
Using a named Site when adding a new wildlife Observation to your database is a straightforward process that follows a similar format to using an OS Grid reference (Tutorial 2.1).
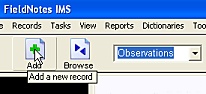
Open the 'New Observation' form
The quickest way of opening the 'New Observation' form is to ensure that the record-type selector is set to Observations, and select the Add button on the main toolbar.
Open the 'New Observation'
form by selecting:
Observations, then
the
Add button.
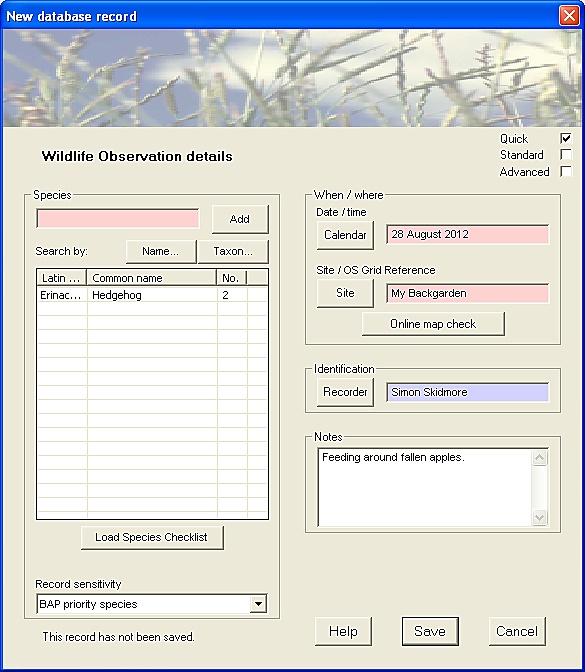
The 'New Observation' form is displayed, containing the fields used to record a new wildlife Observation.
Certain field values are initialised with values based on the current session.
The 'New Observation' form
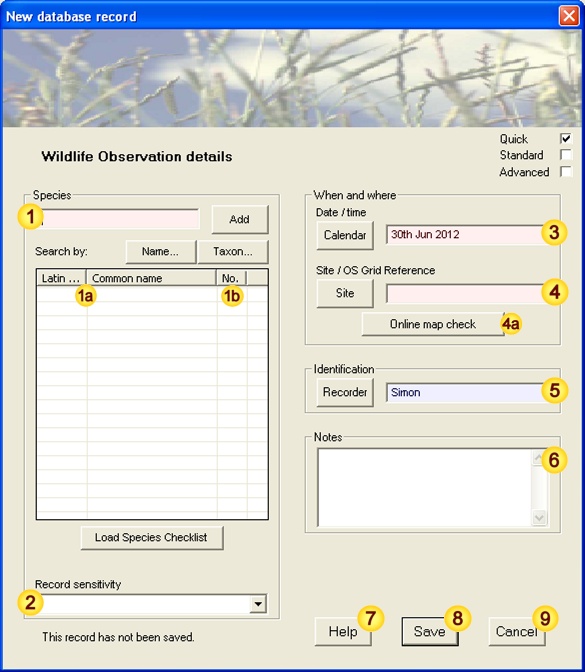 Input data fields
| Field | Notes |
| Species | Species name (common or latin name) |
| Species entry | (auto-generated from field ) |
| Abundance | No. of individuals seen |
| Record Sensitivity | Species Sensitivity assessment |
| Date / time | When the Observation was made |
| Location | Where the Observation was made |
| Recorder | Who made the Observation |
| Notes | Additional notes |
|
| Help | Field-content information |
| Save | Save data as new record |
| Cancel | Cancel the form |
Notes:
-
Mandatory fields (light red) are essential for creating a valid record.
-
Advisory fields (light blue) provide important or useful information for subsequent processing.
In general it is good practice to provide as much information (ie. complete as many fields) as possible.
Preliminary - check the level-of-detail
Check that the level-of-detail (displayed on the right-hand edge of the form title) is set to 'Quick'. If it is not, select the appropriate checkbox.
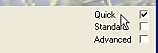
Setting the level-of-detail
checkbox to 'Quick'
[applies to most forms]
In this case level-of-detail affects the number of input fields displayed in a form.
The relevant Help library pages contain more detailed information about using level-of-detail.
Steps in adding a Wildlife Observation (at a named Site)
Sections 1-7 below describe the steps in completing the 'New Observation' form from scratch (in this case using a named Site).
1. Select the Species name
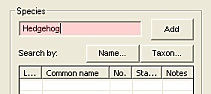
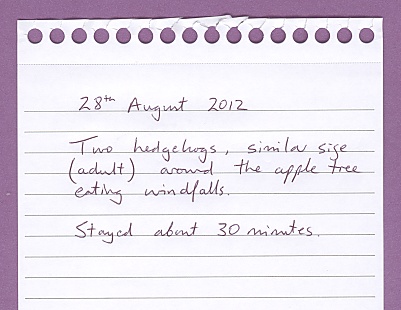
Enter 'Hedgehog' (or the scientific name Erinaceus europaeus if you prefer) in the field named "Species".
After several letters have been entered, the auto-complete function will try to anticipate the species using the closest matching name from the Species database.
Enter the Common or Latin
name in the 'Species' field
Continue typing until the correct species name is displayed, then finish by pressing the Return key or use the adjacent Add button, either of which will add the species name to the species-data list (below the entry field).
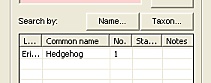
Species name added
to the Species-data list
Note that an abundance of 1 (ie. single species observation) is entered into the relevant column.
Unrecognised species
If you are using this tutorial as a guide whilst adding your own wildlife observations, you may occasionally encounter unrecognised or unresolved species names.
See
Notes (below) for ways to uniquely identify the correct species name.
Enter number of individuals observed
The number of individuals observed (abundance) is automatically set to one when a new species is added to the list .
This needs to be changed to two for the current observation; double-click on the appropriate column in the species-data list (column labelled 'No.' immediately right of 'Common Name') and enter the number of individuals observed.
Then either press the return key or click anywhere else on the form to enter this value.
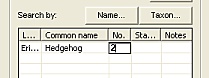
Set the number of individuals
in the species-data list correctly.
Assign a Sensitivity to this Record
Hedgehogs have undergone a significant decline in recent years and are now included in the BAP Priority Species list.
Accordingly this record should be given the relevant sensitivity.
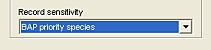
Setting record sensitivity.
Records of Priority Species are particularly valuable to local and national surveys, as the UK Government has an obligation to conserve and enhance the populations and range of these species.
Assessing Record Sensitivity
The 'Record Sensitivity' field becomes more important when you start sharing your data with other recorders / Wildlife recording schemes, as it allows you to select a suitable subset of records based on importance.
When entering Observation data,
FieldNotes will provide appropriate warnings if protected (Red Data Book/BAP Priority) species are recorded with an inappropriately low sensitivity value.
Further information on relevant settings is provided in the
Observation form Help page.
The full list of BAP Priority species can be explored by selecting the menu option.
3. Enter the date when you made the observation
For convenience, the "Date" field is preset to the current date. If this is not the date when you made the observation, then correct the displayed date using either of the two following methods:
3(i). Simply delete the existing value in the "Date" field and type in the correct date (and time if required).
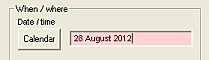
Updating the Observation
date directly
3(ii). Alternatively, press the adjacent Calendar button and select the correct date using the Calendar tool.
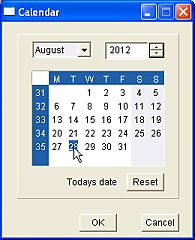
Selecting the
Observation date
using the Calendar tool
When you have chosen the appropriate day/month/year on the calendar, selecting OK will transfer the value into the relevant field on the 'New Observation' form.
Enter the location where you made this observation
In this tutorial we are going to use an existing Site (described in Tutorial 2.2) as the place where this observation was made.
To set this value correctly use either of the following methods:
4(i). Simply type the name of the relevant Site into the 'Location' field.
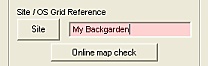
Add the Site name directly.
It is important that the name exactly matches the name of the relevant Site (differences in capitalisation are not important).
4(ii). Alternatively, use the Site button to view a list of sites entered into the database:
Selecting a Site from the list of site records:
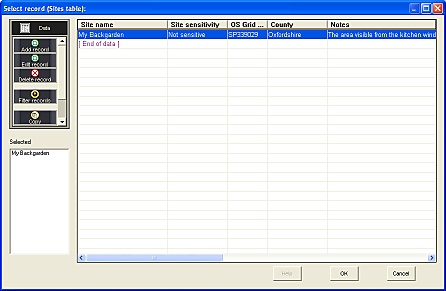
Pick the appropriate site name (by double-clicking - this will add the name to the 'Selected' list on the left-hand side of the form), then press the OK button to enter this value into the relevant field on the 'New Observation' form.
Using online maps to check a site location
Although the field entry refers to a Site record rather than an OS grid reference, the
Online map check button remains functional, extracting the relevant coordinate data from the Site record.
Confirm that the Recorder name is correct
For convenience, the "Recorder" field is preset with the current FieldNotes user.
However if this observation was made by someone else, their name should be entered in this field instead.
To update the field contents, either:
5(i). Simply delete the existing value and type in the name of the person who made this observation:
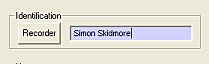
Update the Recorder
name directly.
5(ii). Alternatively, use the Recorder button to view a list of recorders entered into the database:
Selecting a Recorder from the list of recorder records:
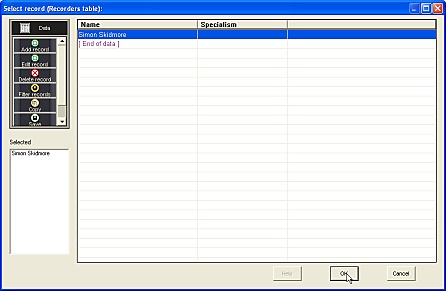
Select the appropriate recorder name (by double-clicking - this will add the name to the 'Selected' list on the left-hand side of the form), then press the OK button to enter this value into the relevant field on the 'New Observation' form.
Add relevant notes about this Observation
The 'Notes' field is free-text format - you may enter as little or much additional information as you like.
For example, you may wish to include notes on observed colour variations, size or behaviour.
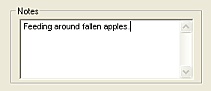
Add relevant notes
for this Observation.
The 'Notes' field will automatically scroll to provide more space for your entry if required.
Alternatively double-click anywhere on the field to use a larger data-entry form.
Review the data you have entered
Take a moment to check that the data you have entered is correct, and agrees with your field notebook entry.
The 'New Observation' form - completed
Field notebook entry
Its never too late to change your mind!
You may change any of the data you have entered in this record (or even delete it completely) later if you subsequently decide that it is incorrect, so saving the record is not a point of no return.
(Details of how to edit existing data are provided in a subsequent tutorial.)
If you are unsure about any of the data you have entered, the
Help button provides more information about acceptable field contents.
8. Save this record to the database
Pressing the Save button will save the information you have entered as a new database record.
Before the information is saved, however, FieldNotes will carry out a number of internal consistency checks on the values you have entered, and warn you if changes are required (eg. if the Observation date is invalid or ambiguous) or desirable (eg. if advisory fields that have not been completed).
If error or warning messages are generated, you will have the opportunity to correct the values you have entered before the record is saved.
Your Observation information is now saved as a record in the database.
Later tutorials will show you how to create reports and plot maps based on your accumulated wildlife Observations.
Errors and Warnings generated by the 'New Observation' form
| Error / Warning Message |
Cause |
| Error | <Species> field must be given a value | The 'Species name' field has not been completed. |
| Error | <Date> field must be given a value | The 'Date' field has not been completed. |
| Error | <Location> field must be given a value | The 'Location' (OS grid reference) field has not been completed. |
| Error | <Date> invalid or ambiguous value | Date (and optionally time) has an invalid or ambiguous format. |
| Warning | <Record sensitivity> is inconsistent with the priority status of "species"
("species" is not a recognised Priority species.) | Record sensitivity may be set too high for this (non-priority) species. |
| Warning | <Record sensitivity> is inconsistent with the priority status of "species"
(This is a Priority Species - consider using "BAP priority species" or higher.) | Record sensitivity may be set too low for this (priority) species. |
| Warning | <Location> is not a valid Site name or OS Grid reference | The OS Grid reference value is not valid. |
| Warning | <Recorder> value does not match any existing records | The Recorder name does not match any Recorders in the FieldNotes database. |
1. In some cases, a species cannot be uniquely identified from the species name that has been entered by the user. There are two main reasons for this:
-
Unrecognised Species names may occur as a result of mis-spelling the intended name, or from using an alternative (in some case local) name that is not included in the FieldNotes species database.
-
Unresolved Species names occur when two distinct species are commonly referred to by the same common name - for example, water boatman, cabbage white (where the common name may refer to several species); eyebright, hawkweed, bramble (where the common name is applied indiscriminately to a number of micro-species).
In both cases the relevant help topic provides guidance for establishing the correct species name.
Additional help topics describe techniques for Exploring the Species database and
Exploring the Taxon database, demonstrating alternative methods for uniquely identifying species.
Speeding up data entry
You can record two or more different species simultaneously, as long as they were both observed at the
same place and on the
same date (and time, if specified), and any relevant notes (step 5) are identical.
Repeat step 1 as many times as required to include the relevant species names in the species data list, and complete the other fields (steps 2-4) as above.
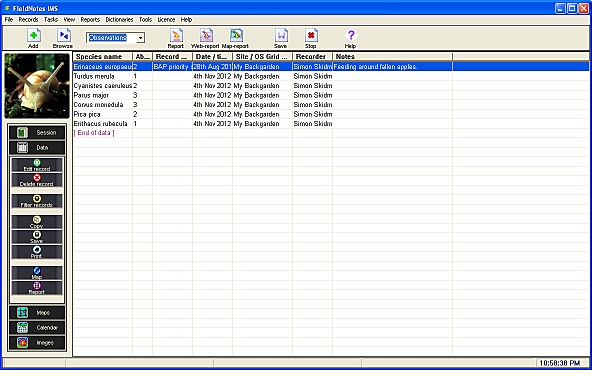
To list the Observations that are associated with this Site ...
You can view all the wildlife Observations associated with this site using the following three steps:
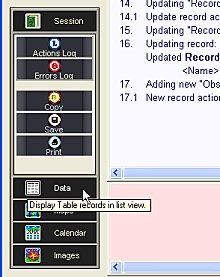
Set the record-type selector (on the Toolbar) to Observations then select the Data taskbar button - a list of all Observations will be displayed in the data-view window.
Select the
Data button
on the Taskbar (Data mode).
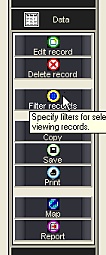
Select the
Filter records button
from the Data sub-tasks.
This will open the 'Data Filters' form.
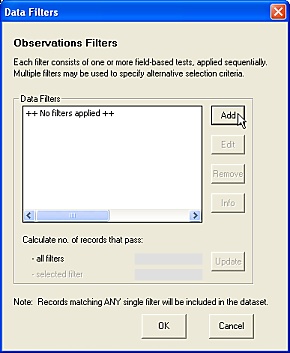
The 'Data Filters' dialog -
lists all filters applied to
Observations records.
Add a new filter
using the
Add button.
Adding a new 'Observations' filter
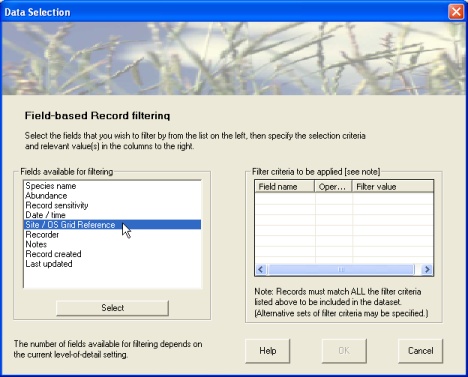
Select the relevant field (in this case Site /OS Grid reference):
... and specify the filter criteria:
-
set the operator to 'eq' (equals) using the selector
-
set the filter value to 'My Backgarden'.
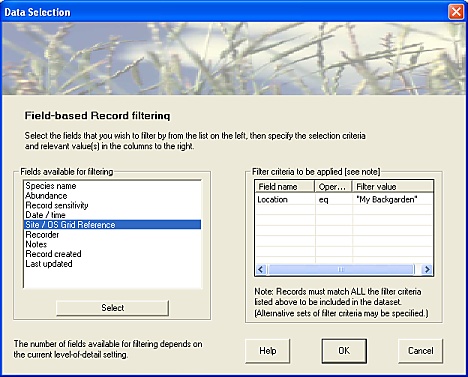
Select the OK button to end both the dialogs.
A list of all Observations associated with this Site is displayed in the data-view window.
The window may be scrolled up/down to view all records, and left/right to examine all fields.
'Observations' records [Data view]