Picture Panel
The Picture panel is located above the task-bar, and displays a random sequence of images while you use FieldNotes. The display is provided purely as a diversion during more tedious processes such as data entry.
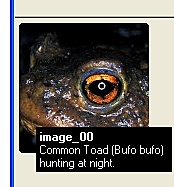
Picture Panel
displaying species information
Clicking on the Picture panel provides summary information about the species displayed (see above).
The size of the Picture panel is relatively small and efficiently implemented using a low-priority thread; in use it is unlikely to adversely affect your computer's performance.
'Images' tool
If you find the Picture panel display distracting, it can be disabled using the 'Images' task-bar button.
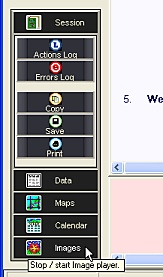
The Task-bar 'Images' button
toggles the Picture panel display
between active / inactive states.
Display Settings
The settings which determine the rate at which the display is refreshed and the fade-time between successive images are accessible in the User-preferences dialogs. The default values are intended to be machine-independent and are time-based (rather than relying on processing sequences). However in some cases (for example under high processing load) some loss of smoothness may occur, and you may have to experiment to find alternative settings which are more suitable for your machine.
Including your own Picture library
The images displayed in the Picture panel are loaded from a library resource 'pp.slr', located in the FieldNotes "fnresources\slr" folder. (FieldNotes is generally installed somewhere like: "C:\Program Files\GreenManSoftware\FieldNotes" - the path may vary slightly depending what version of Windows you are using.)
If you wish to display your own pictures while working, you can create your own FieldNotes picture library using the SLR builder Tool distributed in the FieldNotes "fnresources\tools\slr" folder. Before starting, ensure that your pictures are in jpeg format. It is also adviseable to resize your pictures to 130 pixels by 130 pixels using your favourite graphics program (eg. Paint Shop Pro, Photoshop) to minimise processing.
-
Create a new picture library, following the instructions for the SLR builder Tool.
- Name your new picture library this file "pp.slr"
- Copy your library into the same folder as the original file - this will be in the folder FieldNotes "fnresources\slr".
Tip - locating the FieldNotes executable folder
To locate the location in which your FieldNotes software was installed, click on the FieldNotes icon (short-cut) on your desktop using the right-hand button of the mouse, then choose 'Properties' from the displayed list. The 'Target' field in the 'Shortcut' tab contains the full path to the executable file.Alternatively, if you do not have a FieldNotes icon on your desktop, you can use the Windows 'Search' tool to search for "fieldnotes.exe".
If you replace the version of pp.slr distributed with FieldNotes with your new copy (before starting FieldNotes), your own set of images will be loaded and displayed in the Picture Panel.